Saturday, 10 May 2014

Happy Mother's Weekend!

Mother's Day? Pssst. Not in this house.  Between trying to make my mom feel special and being made to feel special by my husband and son, one day just doesn't cut it.  

Today has been as close to perfect as things can get in my world.  The three of us started the day by heading to an estate sale. No Jenny Lind spool chairs, but I came across a box of costume jewellery necklaces.  


Nothing at the sale was priced at all, so I asked how much they wanted for the whole box.  

Are you ready?  $3.00. 

This picture isn't great, but it shows the 18 necklaces I wound up with. 


The long dark teal one got some air time around my neck for the rest of the day!


We meandered along to another sale a few blocks over where they REALLY knew how to host a tag sale. Everyone there was wearing money belts and they had food and drink!  Hank was treated to a big chewy chocolate chip cookie.

I found these pictures:


They are seven water colours of various landmarks throught the world.  I like the pictures, but more importantly the frames match my hallway decor.  At $7.00 for the lot, there was no passing them up!  Best of all, they have a Simpsons tag on them!  If you're not Canadian and born later then about 1985 you won't have a clue what I'm talking about. Suffice to say Simpsons was a department store that closed down in 1991.  Seeing their branding is a blast from the past!

My mom came over for afternoon tea.  I made her an angel food cake from Better Homes Cookbook.  I bought some bright flowers put the shortly trimmed flower heads in bud vases, tea cups and egg cups.  Boy it looked nice.  Nice enough to take a few pictures, but I forgot to put the memory card in so that moment is lost forever.  Ahh well.  My mom appreciated the effort and that's all that mattered.  

I got her these adorable ceramic and gold goose measuring cups from Anthropology.


It went over well!

We went to see my sister and when I returned Jason surprised me with my Mother's Day present: he fixed my bike!  I'll be honest.  I haven't ridden it since he bought if for me in 2007 (eep), but Hank loves to go for rides with Jason and now I can join in too!  We went for a 40 minute cruise around our neighbourhood and down by Lake Ontario.  It was so picturesque.  I forgot how freeing it feels to ride a bike.   It was truthfully the best gift.  What a day! 

Tomorrow we have another Mother's Day family event and some relaxing.  I hope you're enjoying your weekend and appreciating all the moms and mom-like people in your life.  

Happy DIYing!


A new obsession, quite literally overnight.

Alicia over at Thrifty & Chic has a great blog and on Mondays she reviews model homes in her area.  This past Monday she showed this navy blue and pink themed home.  I noticed the living room chairs with the bead-style spindles right away.

Alicia's picture of the living room
My immediate thought was that they were a vintage find, repainted and reupholstered.  Between Monday and Friday I thought about these chairs more and more.  Last night the obsession culminated into a google search frenzy.  Where to begin? What to look for?

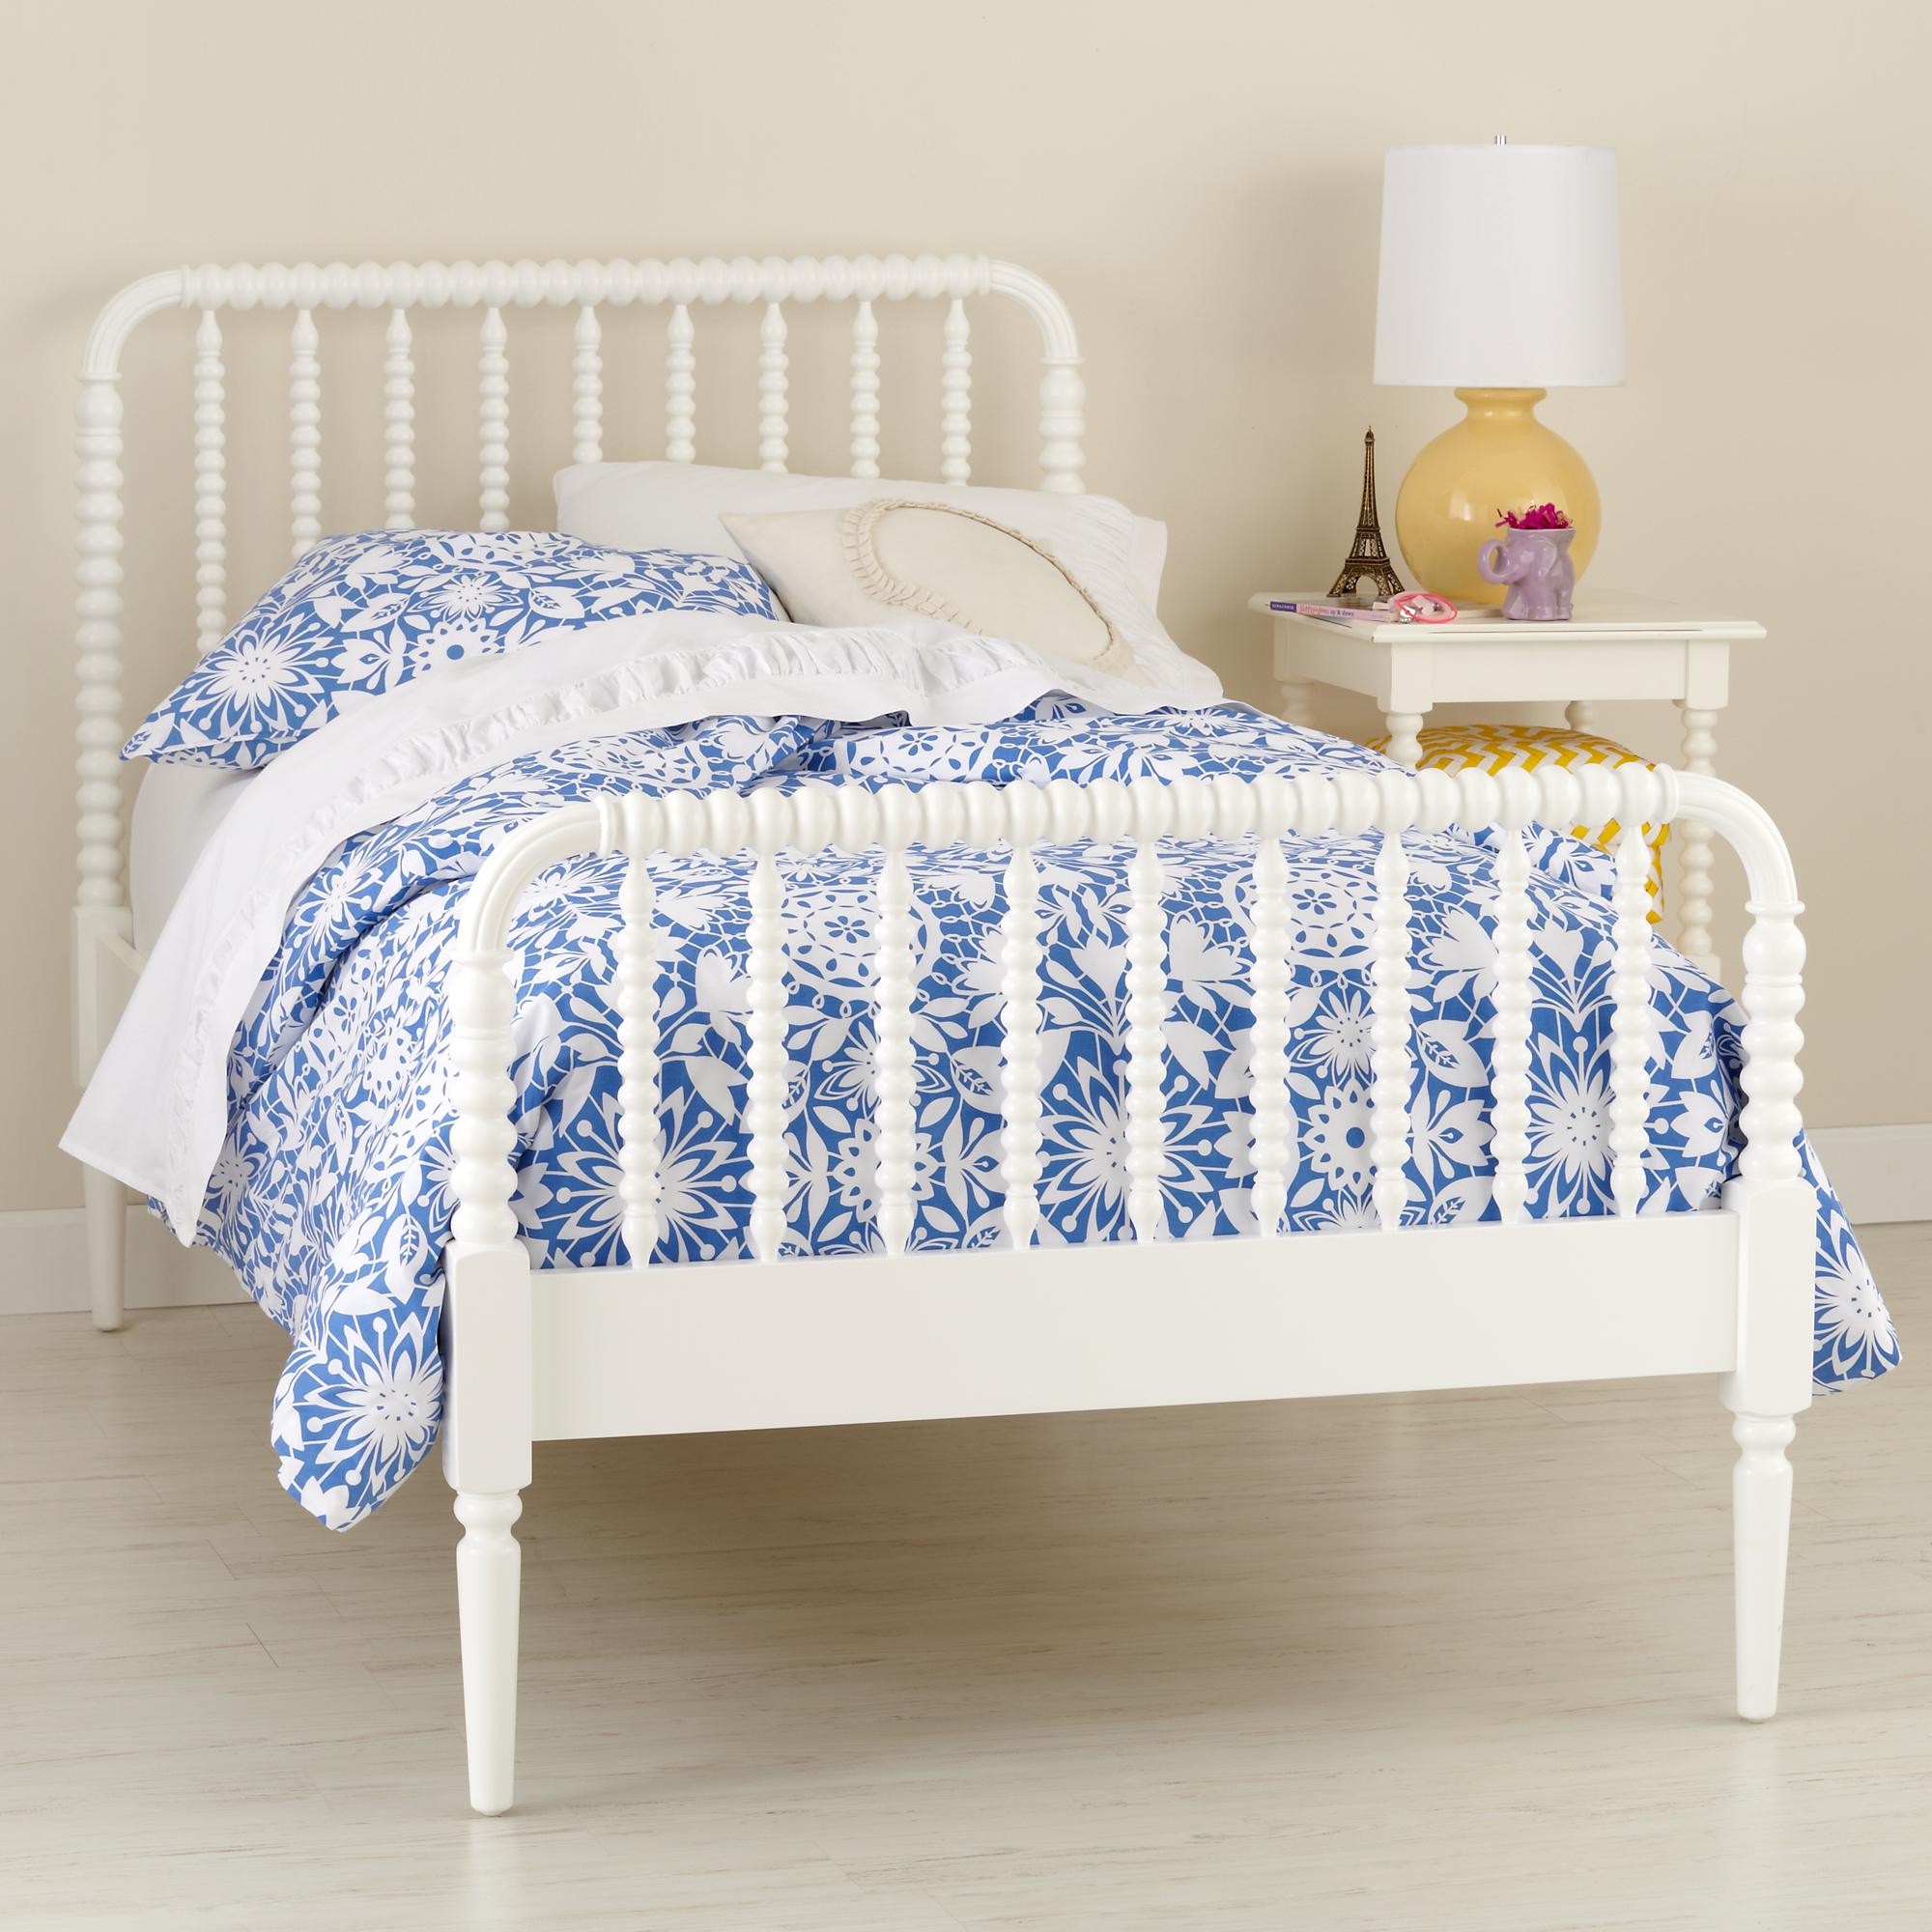
The bead-style of the turned leg reminded me of a Jenny Lind bed

Jenny Lind bed from Land of Nod
  So I started my search there.  Sure enough, Land of Nod has a Jenny Lind style chair:

Land of Nod - $999

Something in my searches led me another name for this little beauty, a spool chair.  This seem to get the best results.  Lay-Z Boy actually sells one too for between $1,500.00 and $1,700.00.

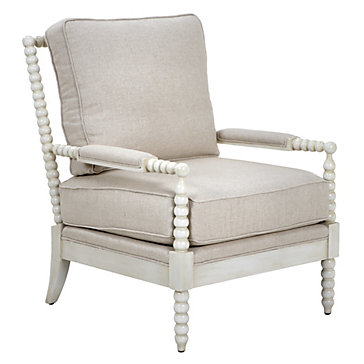
Another retailer, Z-Gallery, sells a similar item for $599.00

Z Gallery

I'm dying to get a couple of these beauties into my living room space but buying two just isn't in the budget right now.  I'm convinced I will be able to find something at an antique market, flea market or consignment store.  It's probably going to to take a while, but I'm patient.  With garage sale and antique market season upon us, my dream might not be so far off.   Speaking of which, I'm headed over to an estate sale and some garage sales this morning.  Wish me luck!

What are you obsessing over lately?

Happy DIYing!

Friday, 9 May 2014

More office updates

My work office is coming together. This is how the unfinished cork board looked


Here it is with some washi tape to jazz things up


I bought three inexpensive rolls to cover the board and some other pieces.


Once I started, I pretty much went to town with it! Washi tape is so easy and fun!


The book shelf isn't done, but it's looking better!

Lastly, I bought this little guy. 


A metal alligator is just so pleasantly unexpected. I couldn't pass him up!


He may have a face for radio, but I love that toothy grin!

Happy DIYing!


Thursday, 1 May 2014

Mini Office Update

I bought a couple small items to style my bookshelf.  Ultimately, the shelf has to contain my files since it's a functional shelf and I have to keep my files organized using the filing system common to my office which isn't exactly pretty (although very functional).  I wanted a shelf or two to be more appealing.

I went to Target and found this beautiful faux coral


It is large enough to make a statement on a shelf without taking up too much space.  I bought a couple frames from the clearance section as well (the Nate Berkus line is amazing). 

I can't make any permanent changes to the office space or the furniture so I'm looking to apartment and dorm-dwellers for inspiration with temporary design ideas.  I bought blue poster tack and I intend to use it with some wrapping paper to cover the interior of my book case and make it a little more special.  I need a paper that is pretty, doesn't look cheap and thin, has a subtle and light print,  is preferably matte finish and doesn't cost a fortune.  I may be looking for a long time. 

I'm also interested in Washi Tape.  Have you heard of this stuff?  It's pretty decorative tape that comes in a thousand different designs, styles and widths.  I definitely think I can do something with it!

Washi Tape from Michaels

There are tons of cute projects on Michaels website and I haven't even touched Pinterest yet.  I have a couple ideas for some blah office supplies. 

Happy DIYing!

Monday, 28 April 2014

Projects on the go


A couple weeks ago I mentioned that I was a bit burnt out from the laundry room mayhem.  I'll be honest with you, we still have not taken a single step towards completion.  Instead, we have started a bunch of other projects which I'm sure will also remain ongoing for some time.

It seems to me that there are many blogs out there that whip through a project at record speed with reveal photos sprouting up moments after the project was undertaken.  Well that's nice for them (really nice) but I can't operate like that.  Weather, timing, budget and desire all play a part in getting my projects closer to completion. 

This is what's on the go at the moment (aside from the laundry room that I have listed here):

Backyard:  We've pulled out a ton of overgrown shrubbery that doesn't work for us and raked up leaves and dead plant debris that we didn't clear out in the fall.  We've stuffed 19 garden bags full of refuse.  We still have an enormous pile of bush and debris left to bundle up and we need to buy some plants for the gaps we've made.  Jason wants some fruit trees and I'm happy to take a back seat on this project.   It will be a lot of digging but I think in a couple years we'll be thrilled to have fruit from our own back yard (we currently have grapes, blueberries, raspberries, strawberries and rhubarb.  We'll also plant some cherry tomatoes shortly too).  We need to take out one of the raised beds at the back of the yard (it's an eyesore that holds way too much decorative grass).  It is also where lawn ornaments either come to mate or die or both.  We found no less than two dozen broken solar-powered lights shaped like various critters.  It is a true menagerie back there.  We're building a shed in its place so that we can clear out some garage space as well as some basement space.

My office space:  As you saw here, I've been working on improving my office-space as well (as in my real work office).  Today I went to Target and bought a couple frames and a piece of fake-but-beautiful coral to try to style my bookcase. 

The hallway:  I'll do a before and after post soon.  We stripped the hallway of its chair-rail wallpaper and discovered that the walls had never been primed, causing a lot of damage.  We had them scratch coated with plaster then primed, sanded, painted and replaced all the old baseboards and trim.  We still need to rip out the front hall closet (it was not originally part of the house - it juts into the garage such that you can't actually get a car in the garage on that side).  Install hooks, shelves and shoe storage for guests, paint the dresser I got from my grandma (below) and make a gallery wall out of gold frames that I need to scavenge from thrift shops. When we do this we'll likely also finish up the hooks and trim in the laundry room since we'll essentially be doing the same thing in the front hall.

Front yard:  Paint the bench, garage doors and front door.  Reuse the bricks from the raised beds in the backyard to make a big black-eyed Susan bed in the front. 

There's A LOT more on the long-term list, but these are the items we hope to get to by the end of the fall.  Aside from my office space, these projects are all intertwined:  to get our car in the garage for winter we need to finish the hallway and clear out space in the garage, hence the need for the shed and the backyard re-do. 

What projects do you currently have on your list?

Happy DIYing!

Sunday, 27 April 2014

More than we bargained for...

It's early spring.  Way too early to see critters crawling around on our carpets and nosing by our garbage.  Unfortunately, that is what we're seeing.

More accurately, this is what we're seeing:

Black carpenter ants.  Curiously, they're creepy-crawling on the second floor of our home rather than on the main floor or the basement where they have a fighting chance at finding some food.

I did a bit of research on them and discovered that they like moist, soft wood.  Given the questionable workmanship we've seen in this house, we're pretty well convinced that there is some moisture in the attic and it has attracted a nest.  Ugh.  "Nest of ants" - doesn't that give you the heeby-jeebies?!  My skin is itching just thinking about it!

In the winter we suspected that one or more of our vents weren't properly installed and are blowing warm air into the attic (our friend who's a roofer mentioned it when he saw that parts of our roof had melted snow on it).  Warm air + cold air = moisture.

An exterminator is coming to check things out this week.  As far as I'm concerned, working with poisons in the home is not a DIY project when you have no knowledge of what to do and kids/pets that could be harmed.  This is money well spent in my books.

Wish us luck and happy DIYing!

Saturday, 26 April 2014

Office organization upgrade!

I bought a large sheet of wrapping paper to cover the phone holder. I traced the interior and exterior shape then glued the paper on (my paper was handmade and irregular so I selected areas that appeared the best to me).  


I wanted prettier tacks but the Kate Spade gold bows that were oh-so-cute were also oh-so-steep at $24.99 for about 15 or maybe 20 of them. Considering the  phone holder is an old tissue box, plain white tacks seemed a little more reasonable. 

The good news was that I had extra paper so I also covered my cork board. 


I'd like to clean up the edges with ribbon but I'll deal with that later. 

For now it's a decent improvement. 


Happy DIYing!

Wednesday, 23 April 2014

DIY Office Organization

As I have alluded in the past, I am not the most organized person in the world.  I would love to live by the mantra "A place for everything and everything in its place" but my mantra seems to be "Stash it with all that other junk because it is momentarily convenient to do so."

In an effort to clear off some desk space I made a cute little cellphone holder.  If you can put a pushpin anywhere in your work-space (cubical or office) you can do this too.

I was inspired by this blog post / pin:

Avie Designs Stationary
But since inspiration struck me while I was sitting at my desk and not at home (where I actually have an ample supply of baby shampoo/lotion containers) I used what I had before me took from a co-worker's office (thanks Marni!).

I cut out the bottom half of an empty tissue box, leaving a large back edge high enough to reach the top of my phone.  I cut a hole in the bottom small enough to fit just the USB end of my power cord.  I pinned it up and by happenstance the pins were far enough apart that they snugly hold my cellphone upright without it teetering to one side or the other.


Beautiful it is not (the cuts along either side are not terribly even since I was eye-balling it - I have since trimmed it a bit better).  Functional it is. Some decorative paper and a couple cuter pushpins ought to do the trick but for now at least another cord and another item is off my desk.

Happy DIYing!

Tuesday, 22 April 2014

Laundry Room: Phase II

Here's the thing about my laundry room reno (and what I assume happens in any reno that involves a major inconvenience): you bust your hump to get to a stage where you can reasonably resume your normal activities (seven loads of laundry that piled up).  'Bust your hump' in my world means use every spare second between work and child care; stay up hours late to finish another step; ignore and deprioritize anything short of necessary-to-live.

What happens next?  You sit down for the first time in weeks and suddenly there isn't a rush to finish the other details, so they collect dust.  

For weeks now the transition piece between the laundry room and the hallway has remained ungrouted. We haven't sealed the grout. We haven't finished the trim work.  We most certainly haven't put the hooks up.  Our garage is still a disaster zone.  I won't even go into decor items (watching a 35 minute Youtube tutorial on making a roman shade nearly gave me hives)!

We lost our steam and we need it back!  The long weekend came and went and while part of me said "Get this done!" Another part of me wanted to sit on my duff and relax! A third part of my brain won the war - it was nice out and we had been cooped up all winter so our team of three went to the back yard and started the overhaul there.  

I've mentally moved on. That bench I mentioned in my last post has been calling my name.  The paint on the wood is flaking off and begging for a good sanding and a glossy coat of creamy yellow.  I'm eager to oblige but the weather isn't cooperating (I need a stretch of days with 15 degrees of warm and no rain .  

How do people actually finish a project without becoming tired or bored?  I would be delighted to know! 

Are rooms ever actually finished?  If you've ever felt like a room was finished let me know and tell me your secrets! 

Wednesday, 9 April 2014

I like free stuff!

My grandmother is moving and has had to pair down her belongings considerably.  She expressed very strongly that she wanted as many of her things to stay in the family as possible (she seem particularly eager for one of her five boys or her 11 grandchildren to have a twin sized mattress that belonged to her mother - ie: a mattress that would likely have qualified for a senior citizens discount at Denny's about 10 years ago). 

Among the mattress and several coffee makers still in their original packing, I found a few things that I could either use (hello eight-cup Pyrex measure!) or had some sentimental attachment to (a few family photographs).

These are some of the gems I scored:


This floor lamp apparently belonged to my great grandmother.  It's brass and has three candelabra style bulbs at the top along with a central bulb and shade that I removed for transportation / don't particularly care for.   The base of the lamp is really cool.  When I up-ended the lamp to go in my truck I discovered a small orange bulb in the bottom.  Apparently the base lights up and the frosted glass is illuminated too. 

I'm in love with this lamp.  I'm not 100% sure where I want to put it, but I just couldn't leave it behind.  I may put it in my living room and build the entire colour scheme around it.  You can't really see from this picture, but the glaze on the base is a bit textured as well. 


Lamps were apparently de rigueur to me on the day I went to grandmas because I also brought this baby home with me.  I'll probably wind up using this in our master bedroom.  It has one of those convenient foot peddle switches.


This small dresser was also my great grandmother's.  I love the pretty carved pattern on all the drawers.  It's going to need some heavy sanding/stripping and a bit of wood filler here and there, but it's otherwise in good shape.  We ultimately want to remove our front hall closet so I'm thinking that this piece will likely become part of the final styling of the front hall where we would have a bench on one side of the stairs and this dresser on the other to balance things out (not to mention a place for keys, cloth grocery bags and small seasonal ware). 


 Last but not least, I picked these two out-door pieces.  The bench obviously needs work but I loved how the iron has some green patina to it.  This is how the pieces look on our front patio:


A little petite looking, actually.  This patio is so large, it's difficult to really imagine what to do with it.  (Also, you can see a birthday balloon still hanging in our front window from the joint party we had for my husband and son this past weekend). 

Once the weather becomes a little more consistently warm we're going to paint the garage doors and shutters (which you can barely see at the top right of the house in this picture) Hale Navy by Benjamin Moore:

Hale Navy

 I want to paint the front door yellow (subject to your comments and critiques of course).
Stuart Gold

I was thinking about painting the bench a couple shades lighter than the front door.  I'll leave the iron as-is and just clean up the wood slats for painting.  

Western Flax

As a reminder, this is what the front of the house sort of looks like (the picture is from the real estate agent who sold the house to us)


  So, what do you think?  Too many shades of colour the front of the house? Give me your input!


Monday, 31 March 2014

April Showers... Inspirations of the month!


Ahhh April.  The snow is melting, the temperatures are slowly rising.  Today I drove with my sun roof open and then opened some windows in my house.  The windows creaked and the screens are dusty, but fresh air just feels so great this time of year (particularly after the harsh winter we had).

I thought I would pull together some Pinterest posts that have been making me excited for April and spring in general.

Rainbow Carrot Mix
How gorgeous are these carrots?  If you have a green thumb and some dirt you can buy these seeds.  Imagine them shredded in a coleslaw or steamed and buttered on an Easter table.  

These are so beautiful they don't even need a bud!  Imagine them lined up in a row on shelf or a single vase on a side table.
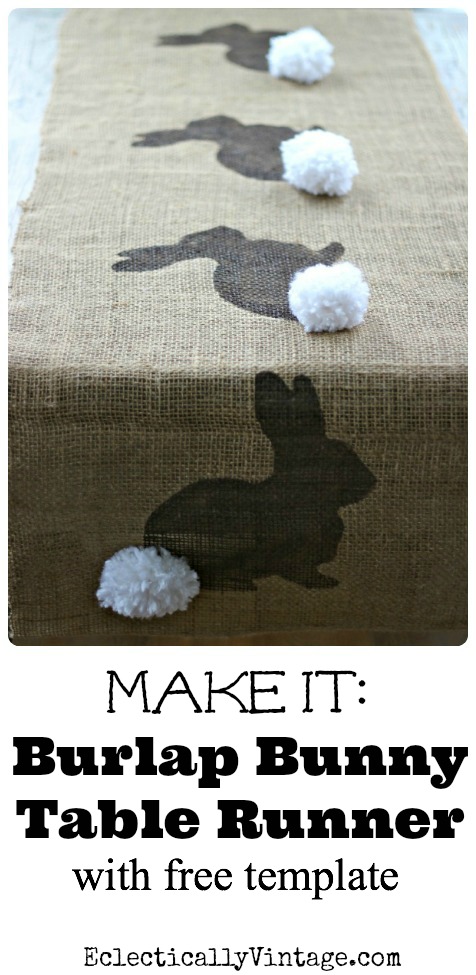
Table runner
I don't know how practical this table runner is, but it was just so cute I couldn't help but include it.  


Rhubarb is my absolute favourite spring harvest.  In our last house I planted and only got a few stalks before we sold (you can't pick it the first year you plant it).  It was with great luck that our current house already had rhubarb planted.  I have a couple favourite recipes I'll share here once ours starts to grow back:  Rhubarb Upside Down Cake and Rhubarb Lemon Spritzers.

Floral fabrics
Spring makes me want to buy every scrap of chintz I can find!  

Gorgeous painted iron
For years I have been keeping my eye out for the perfect iron outdoor furniture that I can paint.  In my mind my fantasy iron is painted an ultra bright hue, but there is something so romantic about the weathered paint on the bench above. 

Peas, red cabbage, Brussels sprouts. Looks like an Easter feast!
This side dish is either your worst nightmare or your dream come true.  I love cabbage and Brussels sprouts so it looks amazing and bright to me.

What are you loving this spring?  

Sunday Soup


Lately Jay and I have been making a big batch of soup on he weekends so we have a quick, healthy meal on deck every day for lunch.

Last week I made chickpea "mulligatawny". I'm using quotes here because I have no basis for an authentic recipe. This is just my version of a vegetarian curry soup.  This recipe makes eight large servings (1.5-2 cups each).

INGREDIENTS
1 tbsp olive oil
1 large onion, diced
1 large carrot, sliced thinly 
2 celery stalks, sliced
1 green pepper, diced 
2 tsp cumin
2 tsp tumeric
1 tbsp curry powder
1/2 tsp ginger powder (or 1.5 tsp of fresh, grated ginger)
1 tsp cracked black pepper
4 cups vegetable broth
tbsp of salt (or to taste)
1/2 cup dried yellow split peas
3 cups (or two cans) canned chickpeas, drained and rinsed 
1 can of evaporated fat free milk (roughly a cup)

All right. Looks like a lot of ingredients, but trust me, once the chopping is done, the majority of your work is over. 

Heat oil over a medium heat in a very large pot (I use my biggest stock pot). Add chopped veg (and grated ginger if you're using fresh). Sauté until slightly tender and onions are translucent. 

Add dried spices (except the salt) and toast them for a minute or two stirring with the veg.  When the spices are very fragrant stir in the broth and as it's warming up add some salt to taste.  


Bring to a boil and add dried yellow peas.   Cover and reduce to a simmer. Simmer for about 45 minutes or until split peas are tender. Add chickpeas and evaporated milk.  Heat through

If you like a thicker consistency you can use a hand blender to whiz some of the soup up. 

I use a canning funnel (a wide mouth funnel that fits over Mason jars) to pour the soup into individual jars (mine hold about 2 cups).  


If I put the lids on while the soup is really hot it will cause the lids to suction onto the jars which makes me feel a little safer when I throw one into my purse. 

After the lids are on I leave the soup to cool completely on the counter before storing them in the fridge. Since we haven't actually gone through the process of sterilizing our jars and canning them properly the soup is not shelf stable but it will last in the fridge at least a week. 

Do you have an easy make-ahead lunch you love? We're always looking for ideas at our house!

Thursday, 27 March 2014

The Swift Thrift

I was inspired by Lindsay over at Little House Blog and her love of thrifting.  She really has a thing for Value Village and a knack for seeing a gem that others might pass by (those starburst glasses would look so sophisticated at a New Years Eve party).

I actually couldn't contain myself and rushed over to the Value Village near me.  It's pretty new and absolutely massive!

Within five minutes I had my cart filled with picture frames, a few milk glass bud vases, two ceramic horses rearing up on their hinds and two marble-esque horse bookends (I'm really not as into horses as this post makes me seem.  I actually don't own anything horse related, I was just drawn to them that day).

As I was looking through the furniture section I spied it.  The dresser I have seen redone in so many amazing ways. My mind was spinning at the thought of having one of my very own.

So pretty!


I have painted / stained a couple dressers and I've learnt a little along the way:

  1. Don't buy large furniture unless you have a place to a) store while you're fixing it up and b) ultimately place in your home
  2. Don't take home furniture with structural problems: cracked wood, broken chair supports, drawers that are not easily repaired
  3. B.I.N Shellac based primer is your friend and will seal in a multitude of sins. 
Luckily this one was in fine condition.  Just a few nicks and scratches here and there with one decent chunk taken out of the corner.

I'll repair this with wood filler.


I simply could not pass up this opportunity and for a whopping $34.99 my investment risk is pretty low!  Apparently I had just missed out on the matching side tables.  I boo-hoo'd a bit at that. 


I'm not 100% sure what I'm going to do with it yet - I know I will paint it but I can't decide on a colour.  Good thing it's still too cold here to do any painting so I have some time to think about it.  I can tell you this - I am not looking forward to sanding this baby.  

 Since I bought the dresser, I wound up putting back a few decorative things and settled on these:

$4.99 each

I need to figure out where they are going to live, but I shouldn't have too much trouble finding them a home. 

$3.99

 I also bought this ornate gold frame which fit in perfectly with my hallway vignette


My big regret was not getting the milk glass bud vases that were $1.99 and $0.99 each.  They would look so cute on my new laundry room sink counter!  I may have to go back for them...

That's it!  Help me pick a paint colour for the dresser and I will be forever indebted to you!

Happy DIYing!